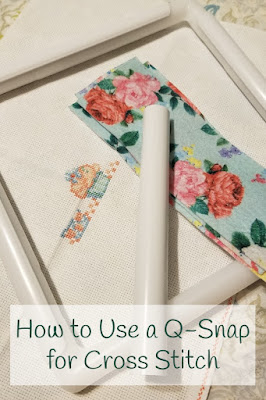
I started using a Q-snap about a year and a half ago and I don't plan on ever going back to a hoop.
After hours and hours of stitching, there is nothing more frustrating to me than prepping a stitched piece to frame and the hoop marks throughout the stitched area just won't come out. It didn't matter how much I ironed, they just wouldn't budge and I could see them after framing.
At first, I was intimidated by the q-snap frame because I had used a hoop for so many years, but I wanted to at least try it and I absolutely love it!
I would definitely recommend purchasing the brand Q-Snap and not an off brand because I have read complaints that the clamps on off brand frames become loose and won't hold the fabric tight enough after a while.
When I first started using this frame, I did have figure out the best way to tighten the fabric and how to hold it so I wanted to share with you a few of my tips and what has worked best for me.
This post contains affiliate links. If you purchase an item through these links I may receive a commission at no additional cost to you. Read the full disclosure here. Thank you for supporting my blog!
How to attach and remove your fabric.
I start by laying the Q-Snap frame on my lap or a flat surface and placing my fabric on top of the frame.
Next, I will place a piece of felt on top of my fabric on the right side and push on the clamp.
To tighten the fabric, I place my thumbs under the felt and push the edge of the clamp to help rotate the clamp until the fabric is as tight as I would like.
Once my right clamp is in place, I attach the left, top and bottom clamp the same way always making sure to tighten each side of fabric as I go. You can always push/roll the clamps a bit to tighten the fabric more as you work if it becomes slightly loose.
When I first started using this frame, I struggled with getting the clamps to move when I was attaching my fabric and pulling the clamps off because they are pretty tight on the frame once the fabric is in place. After I started using felt under the clamps it made it a lot easier to move the clamps since I use the felt to move them. Using felt with the Q-Snap will also help protect your stitches.
To remove your fabric from the frame, turn over the Q-snap to the back of your project and push the clamp from under the felt to detach the clamp.
How I hold my Q-snap.
There are a few people that have mentioned they have a hard time holding the q-snap in their hand due to the bulkiness and weight. I have found that if I have one hand underneath the back of my project instead of trying to hold the frame with my hand, it's easier for me to use. You could also use a stand to hold the Q-Snap while you are stitching such as the Lowry stand.
Are there really no wrinkles or creases?
The only wrinkles I have had on my projects since switching to a Q-Snap frame is the original wrinkles that are in the fabric from packaging or where I have gathered the edges of my fabric while I'm stitching. But, I have never had this frame cause wrinkles on the main area of my projects. I do recommend always removing the frame once you are done stitching for the day to prevent permanent creases that may not be easily removed. I have found that by removing the frame every time, any creases that have formed will usually fall out or be easily removed by ironing.
What do you do with the extra fabric that's hanging out from the frame?
Personally, I pull the extra fabric away from my stitching area and clip it with what I have on hand which is binder clips. There is also the option of using Wonder Clips or a Grime Guard. Grime Guards come in various sizes depending on what size Q-Snap you are using.
I hope my tips have helped!
Happy Stitching!!


No comments:
Post a Comment
Please leave a comment! I would love to know you were here!